Drying And Curing Weed: The Why, How, and What of Perfect Buds
It takes much time, resources, and effort to grow a healthy mature cannabis plant. Before the plant can come to market, the buds must be dried and cured. If not done correctly, the whole endeavor will be wasted.
As vital as adequately drying and curing cannabis is to an operation, few people know how to do it correctly. Our growers at Gro-UP do know how to do it properly. They have decided to share their knowledge with you!
What’s Difference Between Curing Weed and Drying Weed?
Many people use the terms drying and curing interchangeably, so there is some confusion as to what differentiates the two. Here’s what each word means as it applies to pot production.
Drying Weed
Drying cannabis flowers is equivalent to drying your body after a shower. The towel removes all the water and moisture from the skin’s surface, but all the moisture in the skin remains. The cannabis flower needs to have more than the surface moisture removed. Curing cannabis flower removes the moisture drying leaves behind.
Curing Weed
Curing cannabis is the manipulation of moisture deep within the cannabis flower. Curing controls the chemical reaction from plant decomposition without the plant decaying.
Much like aging wine or spirits in barrels, curing cannabis develops flavors and aromas and maintains the terpenes and cannabinoids inherently in the cannabis plant. Curing flowers is necessary to bring out the plant’s desired effects on the human mind and body.
What does Curing Cannabis Do?
Every plant starts to decay the moment it is harvested. Vegetables lose moisture and nutrients the moment they are harvested, so it is essential to eat them relatively quickly. The same is true of cannabis, but curing the plant keeps all the compounds in the plant. Curing concentrates the compounds by removing moisture.
The Flavors & Aromas
If you remember high school biology, you will recall that plants use chlorophyll to convert sunlight into food. Chlorophyll is the compound responsible for a grassy aroma and flavor found in fresh cannabis. It is more pronounced in beverages containing juiced fresh cannabis. Chlorophyll’s flavor and aroma dominate many of the other flavors and aromas that are in the plants. Curing breaks down and removes chlorophyll allowing the different flavors and aromas to stand out.
Each strain of cannabis has a unique flavor and aroma profile. Think again about wine. Each grape is different. Aging the grapes and converting the sugars to alcohol releases aromas and flavors hidden within the grape. Lemon Kush has sweet citrusy flavor notes, and Sour Diesel has a pungent flavor profile with a diesel smell. The traits of Lemon Kush and Sour Diesel are developed during curing.
The Experience
You could smoke cannabis once it is dried. The smoke would be harsh due to the chlorophyll and would leave an acidity burn in the throat. Proper curing mellows the harshness caused by the chlorophyll leading to less coughing and a smoother smoking experience.
The Effects
Curing enhances the terpenes and cannabinoids. Since those compounds are responsible for the effects on the mind and body. Curing also reduces the negative aspects of cannabis, like anxiety or paranoid feelings. Curing provides time for the terpenes and cannabinoids to fully develop, increasing the potency of the health benefits of the flower.
Drying And Curing Weed Takes Time
Once again, we turn to wine. It takes many years for a great wine to achieve its full potential. Drying and curing don’t take as long as making wine, but allowing the proper time for each is necessary to reap the rewards of the growing efforts.
Drying takes seven to ten days, depending on the environment (temperature, humidity, and airflow). Curing times are dependent on the quality desired. A good quality harvest can cure in two to three weeks. The quality will be outstanding if that same harvest is cured for four to eight weeks. Some strains reach their peak within six months of cure time.
It is worth the wait for a quality bud, but shortcuts are taken in today’s business environment. Not only does this diminish the quality of the flowers, but it also makes the cannabis more susceptible to mold and fungus growth.
Steps to Dry and Cure Cannabis
Step One: Harvest your plants and trim the leaves.
Harvest your plants at the peak of bud production to help maximize the development of the trichomes (glands that produce cannabinoids like THC and CBD). Next, separate the buds from the main stem and trim off any leaves growing from the bud.
Trimming the leaves is essential to understand. The efficacy or the ability to produce the desired result of drying and curing depends on how thoroughly the leaves are cut after harvest. Every part of a plant contains levels of chlorophyll, but the leaves have a higher amount than the buds. As discussed above, chlorophyll is mainly responsible for the harshness and coughing of cannabis. Hand trimming away all the leaves ensures the cured buds will provide a smooth smoke.
The trimming process requires much room, so be sure to have a table cleared off for the procedure. Depending on how many plants you harvest, trimming can take time. Make sure you make yourself comfortable.
Trimming cannabis will intensify the aroma of the plant. Setting up some ventilation will reduce the dankness caused by trimming. Your entire house, including furniture and all of your clothes, will absorb the smell. To avoid this, build a quality ventilation system in your “trim room.”
Ventilation is an optional step, and so is using gloves; however, both are recommended. Trimming is sticky due to the fresh resin on the buds. Wearing disposable gloves will make washing your hands every five minutes unnecessary.
If you choose not to use gloves, you will need rubbing alcohol to remove the resin. Soap and water aren’t going to work.
When the gloves get too sticky, change them for a new pair. DO NOT discard the used gloves. Remove all the resin from the used gloves when you finish trimming. This is essentially hash and can be added to your next bowl as a reward for your work. Simply roll the resin off the gloves into balls. This is the most ancient method for making hashish.
*NOTE* Avoid latex gloves. Many people have an allergy to latex. Latex may transfer to the bud, and if someone highly allergic to latex consumes your cannabis, they could have an adverse reaction.
Remove the branches from the plant.
Remove the branches from the cannabis plant stem and lay them on sheet trays. Some branches will be too thick for scissors, so have pruning shears handy.
Remove the fan leaves from the branches.
The fan leaves are easily identifiable. They look like every picture of marijuana used for the last 50 years. If you still need help identifying the fan leaves, they grow out of the buds at the ends of the branches. They can easily be removed by hand. Grip the fan leaf at the base of the stem near the branch and pull it down until they snap off. Again, use gloves during this stage because you will encounter resin. Save all the fan leaves in a bowl to be utilized later.
Remove the sugar leaves.
Once the fan leaves are removed, you will see smaller leaves growing from the buds. Typically only the tips of the leaves are visible, so you will not be able to grip them without damaging the bud. Use small pruning snips (different from the pruning shears) to cut away the sugar leaves, so they are flush with the bud. Do your snipping over the same bowl that holds the discarded fan leaves. Your snips will contact resin. If they become too sticky, scrape off the resin, saving it for later, and clean the snips with rubbing alcohol. Be sure the snips are dry before removing more sugar leaves.
Continue these steps until all the buds are removed and trimmed.
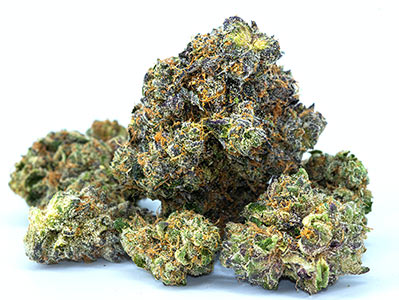
The finished trimmed bud should look like this:
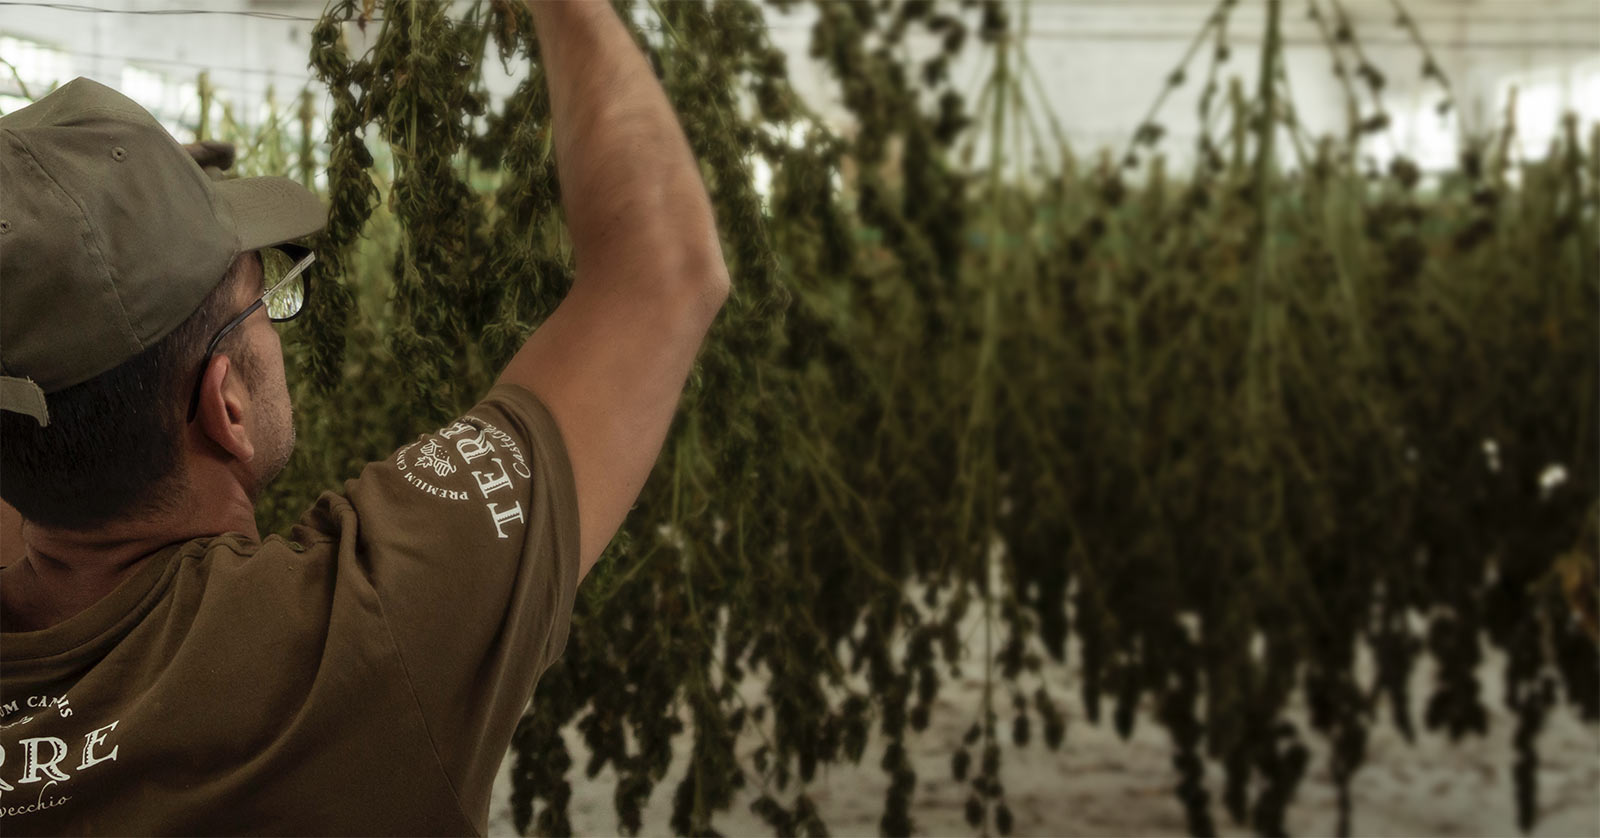
Step Two: Hang the Cannabis to Dry
All the leaves should be removed at this point, so the only things remaining on the branches are the buds. Choose a closet to hang the branches in. Tie each branch to the bar and let it hang. Be sure to leave the door open to allow air to circulate.
The ideal drying environment is 70° F with 50% relative humidity. Depending on where you live, and the time of year, you may need additional equipment to achieve the desired temperature and humidity levels.
Monitor the temperature and humidity, ensuring it stays in the correct zone, and the cannabis should be dried in seven to ten days. The buds are ready to be cured if they feel dry to the touch and the smaller stems snap rather than bend.
Step Three: Transfer the Buds to Glass Jars for Curing
Wide-mouth canning jars are best for curing cannabis flowers (brands like Mason or Ball). Make sure to buy the container with lids. If you are reusing jars, purchase new tops for the best results.
Loosely fill the jars three-quarters full and seal with the lids. A good test is if you shake the jar, the buds should move around. If they don’t move, open the jar and remove buds until they can move freely.
Once all of your buds are in sealed containers, place them in an area that will not be exposed to the sun. Sunlight can heat the contents of the jars and cause the humidity within the jars to elevate. As in drying, curing has an ideal environment. The temperature should remain at 70°F, but the humidity should increase to 60-65%. If the closet used during drying doesn’t have sun exposure, it should be the ideal location to cure the buds.
For the first few days of curing, open and inspect the jars a few times a day. If your buds are still a little moist, the air circulation will release the moisture trapped in the jar. If this step is skipped and the buds haven’t dried enough, the likelihood of mold growth increases. After a few days, the jars should be left alone for seven days.
After seven days, do the following:
- Remove the lid of each jar for five seconds
- Reseal the lid
- Gently shake the jar to circulate the new air
This process is known as “burping.” During the second week, burp each jar once a day. If everything looks dry after the second week of daily burping, move to burp the jars once a week for the next two weeks. That will complete the first month of curing. After the first month, you only need to check (open the jars and shake) once a month for the remainder of the curing process.
Plant-Matter Uses
Remember all the scrap saved during the trim process? Here is what you can do with the leftovers.
Stalks: Make mulch by putting it through a woodchipper. If you don’t have a woodchipper, cut them into small pieces and place them in a compost pile. Stalks don’t have any value to the human body but have value to future generations of plants.
Fan Leaves: Juice the fresh leaves or dehydrate them to brew as tea. Fresh leaves are believed to have anti-inflammatory properties, but this hasn’t been proven yet.
Sugar Leaves: Sugar leaves contain small amounts of cannabinoids; steep the leaves in butter, press through a fine mesh strainer, and refrigerate in an air-tight container. Use the cannabutter in future recipes.
Drying and curing cannabis is a labor of love. Whether you grow for personal consumption or to share with friends, properly processed buds provide the best results. Patience is essential and worth the wait. Curing gives buds time to mature. Once mature, the buds will reward you with a potent smoke filled with flavorful terpenes.
